Canning Green Beans the Old-Fashioned Way
Canning green beans the old-fashioned way is a tradition passed down through generations, allowing families to preserve the freshness and flavor of their homegrown harvest. By canning green beans, you can eliminate the need for added preservatives commonly found in store-bought canned vegetables, ensuring that you and your family enjoy a healthier, more natural option all year round. As a delicious and nutritious side dish, canned green beans are a versatile ingredient that can be used in a variety of recipes.
The age-old practice of canning green beans involves a meticulous process, ensuring that the beans maintain their quality and nutrients. By preserving them in airtight jars, you prolong their shelf life, enabling you to stock up your pantry with a homegrown supply. Understanding the canning process, preparing the green beans, and choosing the right equipment will set you on the path to successfully canning green beans the old-fashioned way.
Key Takeaways
- Canning green beans the old-fashioned way preserves their freshness and flavor.
- Understanding the canning process and proper equipment is essential for successful preservation.
- Home-canned green beans can be used in various recipes, adding a nutritious touch to your meals.
Understanding Green Beans
Green beans, also known as snap beans, are a delicious and healthy addition to any meal. They come in a variety of colors and sizes, including yellow beans (also known as wax beans), and both pole beans and bush beans. Growing your own green beans in your garden is not only rewarding but also gives you access to fresh and tasty produce.
Growing Your Own Green Beans

I’ve found that growing my own green beans is an enjoyable and fruitful endeavor. This way, I can harvest fresh green beans right from my garden, savoring their flavor and nutritional benefits. Green beans can be grown easily in home gardens by planting either pole beans or bush beans.
Pole beans are vining plants that require a trellis or some type of support for them to climb. They tend to produce beans over a longer period, allowing for a more extended harvest. In comparison, bush beans are more compact and don’t need any support but will produce their beans all at once, resulting in a shorter harvest window.
To start growing your own green beans, choose the variety you want to plant and prepare a sunny, well-draining spot in your garden. Sow the seeds directly into the soil in spring, and make sure to water consistently. Pay attention to the specific requirements of the type of beans you’ve chosen, such as the height of the trellis for pole beans or appropriate spacing for bush beans.
Planting your own green beans in your garden has many advantages, including the pleasure of harvesting and canning your own produce.
History of Preserving Green Beans
I’m well-versed in the history of preserving green beans, which dates back centuries. Before the days of refrigeration and freezing, home food preservation was the primary method of keeping food fresh for longer periods. Canning green beans the old-fashioned way is one of the various techniques used by our ancestors to ensure they had access to nutritious vegetables even during the off-season.
Home canning was not only a practical skill but at times also a necessity for families living in rural areas. In many cases, families planted extensive gardens every year and canned the surplus produce, green beans being one of the most popular items, for consumption during winter months. The old-fashioned way of canning green beans involves using a hot water bath canner instead of a pressure canner, which became popular later on.
The process of home canning typically begins with fresh green beans, picked at their peak of ripeness. Once washed and trimmed, the green beans are packed into sterilized jars, sometimes alongside other ingredients like onions or bacon. During the old times, people used to seal the jars with wax to keep the air out. This method, though less common today, is still practiced by some old-fashioned canners.
In conclusion, preserving green beans using the old-fashioned way is a skill that has been passed down through generations. It showcases the resourcefulness of our ancestors and the importance of home food preservation in our history.
Choosing the Right Equipment
Choosing the Right Canning Method

When it comes to canning green beans the old-fashioned way, selecting the right equipment is essential for success. There are two primary methods for canning: pressure canning and water bath canning. I’ll walk you through the key tools and equipment required for each method.
Pressure canning is the preferred method for canning low-acid foods like green beans. To get started with pressure canning, you’ll need a pressure canner or a pressure cooker. Pressure canners come in two variations: dial gauge and weighted gauge. Both types work effectively, but I recommend using a weighted gauge pressure canner because they require less maintenance and you don’t need to calibrate the gauge.
Canning jars, in pint or quart sizes, are essential for preserving green beans. When selecting jars, make sure they’re designed specifically for canning to ensure proper sealing and food safety. To simplify the process, I suggest using a canning funnel for filling jars and a jar lifter to safely remove hot jars from the canner.
Water bath canning is suitable for high-acid foods like jams and pickles, but not ideal for canning green beans. However, if you choose this method, you’ll need a boiling water canner or a water bath canner. Keep in mind that this method is not recommended for safely preserving low-acid foods like green beans.
Nowadays, some people use Instant Pots as an alternative to traditional pressure canners. Although it’s a versatile appliance, I highly recommend sticking to a regular pressure canner for canning green beans for reliable results and food safety.
In conclusion, to successfully can green beans the old-fashioned way, opt for pressure canning with a weighted gauge pressure canner and appropriate canning supplies like jars, a canning funnel, and a jar lifter. Choosing the right equipment ensures a safe and efficient process, allowing you to enjoy your preserved green beans for months to come.
Preparing Green Beans for Canning

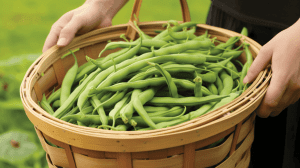
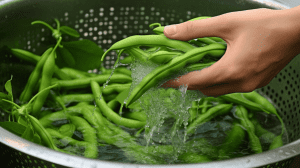
First, I gather my fresh string beans and begin preparing them for canning. I start by washing the beans in cold water, making sure to remove any dirt and debris. After they’re clean, I trim off the ends and cut the beans into bite-size pieces.
Once the beans are cut, I bring a large pot filled with several inches of water to a boil on medium heat. I also prepare my canning jars by washing them in hot soapy water and thoroughly rinsing them. At the same time, I heat my new lids in a separate pot of hot water.
Now it’s time to blanch the green beans. I add the beans to the boiling water and let them cook for about 3-5 minutes. While they’re cooking, I prepare an ice bath for the beans to be immediately transferred to once they’re done. This process helps preserve the color and texture of the green beans.
After the beans are cooled in the ice bath, I carefully pack them into the prepared jars, leaving a 1-inch headspace. For added flavor, I include a few garlic cloves and a teaspoon of sea salt in each jar. However, if you prefer, you can also add a teaspoon of salt instead.
With the beans packed, I pour boiling water over them, leaving a 1-inch headspace in each jar. I then carefully remove any air bubbles using a non-metallic tool and wipe the rims of the jars to make sure they’re clean. Next, I place the heated lids on top of the jars and secure them with the ring bands, tightening them until they’re fingertip tight.
Now that the jars are filled and sealed, I lower them into a canning pot filled with enough quarts of water to cover the jars by 1-2 inches. Once the water returns to a rolling boil, I process the green beans based on the recommended processing times for my altitude.
The Canning Process
As someone who enjoys preserving my own food and using the old-fashioned methods, I have found canning green beans to be a rewarding experience. The canning process for green beans involves two methods: the raw pack method and the hot pack method. Both methods ensure the freshness and taste of the beans are preserved throughout the year.
In the raw pack method, I start by preparing the beans; washing them, trimming the ends, and cutting them into uniform pieces. After prepping the green beans, I pack them into hot jars, leaving an inch of headspace at the top. I then pour boiling water over the beans, maintaining that inch of headspace and use a bubble popper to remove any air bubbles trapped in the jar. This step is crucial as air bubbles can compromise the seal and cause spoilage. After that, I wipe the jar rim, secure the lids, and proceed to the canning process.
Alternatively, the hot pack method involves boiling the green beans before packing them into the jars. Essentially, I would first bring the green beans to a rolling boil in a pan, then scoop them into the hot jars, making sure to leave an inch of headspace. Again, I’ll use the bubble popper to remove any trapped air and top the jars up with more boiling water if necessary to maintain the headspace before securing the lids.
Regardless of the method used, I ensure that the water level in the canner remains about 2 inches above the jars during the process. Processing times may vary, but generally, between 20-25 minutes at 10 pounds of pressure should suffice. This high heat preserves both high-acid and low-acid foods, including green beans.
Once the processing time has elapsed, I turn off the heat and wait for the pressure to return to zero before carefully removing the hot jars with a jar lifter. I often let them cool at room temperature for about 12-24 hours, ensuring that a good seal has been formed. If the seal is secure, I can safely store my green beans and savor the taste of my own food throughout the year.
Successfully canning green beans means that I can easily whip up a green bean casserole or a simple side dish straight from my pantry. Knowing that the National Center for Home Food Preservation supports and endorses these methods gives me confidence in my food supply, and the satisfaction of enjoying green beans as if they were picked fresh from my garden last year.
Post-Canning Procedures
After the canning process, here’s what I do to ensure the best flavor and storage for my green beans. First thing, I remove the jars of green beans from the hot water bath using tongs and let them cool for about 10-15 minutes. Cooling time is necessary for the lids to create a good seal, especially at higher altitudes.
While the jars cool down, I make sure to keep the processed green beans away from any drafts to prevent cracked jars. I then check for a proper seal by pressing down the top of the jar; if there’s no movement, it indicates a good seal. If the lid pops up and down, the jar hasn’t sealed properly and must be reprocessed using the water bath method.
To store the jars properly, I wipe the rim of each jar and the screw bands clean using a cloth dampened with white vinegar. This step is essential as it removes any residue or raw beans remnants on the inside of the jar, which may interfere with the seal. I also make sure that all the screw bands are tightened securely.
Before storing the filled jars, I label them with the canning date and the type of green beans inside for easy reference. Storing the jars in a cool, dark place helps to preserve the best flavor and ensures they last longer.
Canning green beans the old-fashioned way can be a lot of work, but the step-by-step instructions and simple tools available make it more accessible for everyone. For first-timers and those interested in easy ways to undertake this process, you may find some affordable canning tools online. Keep in mind, cutting the green beans into one-inch pieces and adding a teaspoon of canning salt per jar enhances their flavor and ensures the top of the beans stay submerged in the water bath canning process.
Remember that processing times may vary according to altitude—be sure to adjust the time accordingly if you are located above sea level. And that’s it! Your canned green beans are ready to be enjoyed throughout the year.
Canning Green Beans Recipe Ideas
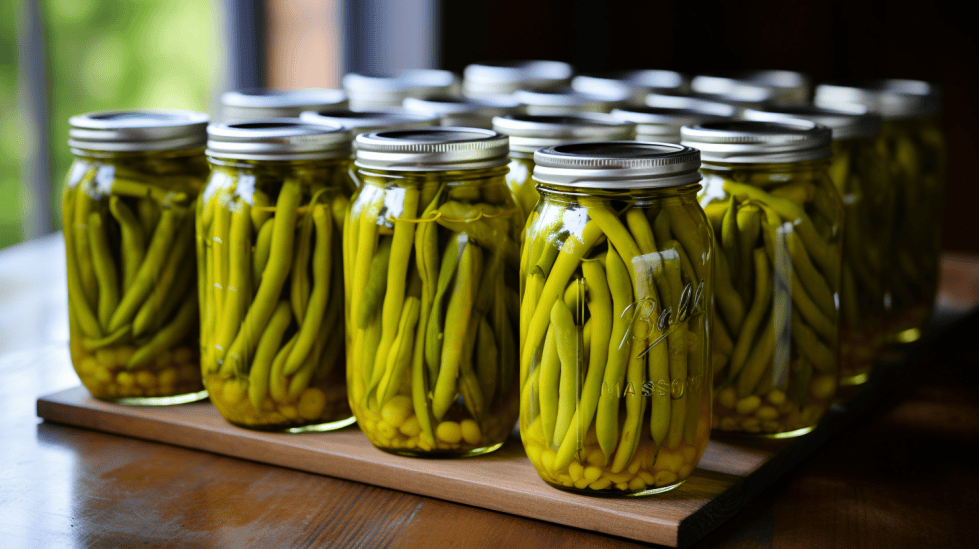
I love canning green beans the old-fashioned way as it preserves their taste and freshness without any added preservatives. One of my favorite recipes is dilly beans, which adds a tangy twist to the classic canned green beans. The process involves adding dill, garlic, and black peppercorns to the jars before filling them with blanched green beans.
For other exciting canning recipes, I always turn to Happy Canning. They have an extensive collection of ideas, such as canning green beans with onions or even canning green beans with bacon, which infuses the beans with a smoky flavor.
In my opinion, the best way to can home-canned green beans is by using a pressure canner because it ensures that the beans are processed safely. However, if you don’t have a pressure canner, you can also use the water bath method. Just make sure to follow proper guidelines to avoid any safety issues. During the process, I recommend using this step-by-step guide to ensure a perfect batch of canned green beans every time.
I always feel confident in my knowledge when it comes to canning green beans, and I believe that trying out various recipes allows me to enjoy home-canned green beans with different flavor profiles throughout the year. So, go ahead and experiment with various recipes to find your favorite way of preserving green beans, and I guarantee you’ll have delicious and nutritious veggies to enjoy all year long.
Frequently Asked Questions
What is the recommended processing time for canning green beans?
The recommended processing time for canning green beans depends on the method and elevation. In general, using a pressure canner at 10 pounds of pressure, process pint jars for 20 minutes and quart jars for 25 minutes. For higher elevations, refer to specific guidelines in a reliable canning guide. Remember, processing times are important to ensure food safety.
How does water bath canning differ from pressure canning for green beans?
Water bath canning and pressure canning are two distinct methods for preserving food. Water bath canning is better suited for high-acid foods, like fruits and pickles, while pressure canning is necessary for low-acid foods, like green beans. Pressure canning uses high heat and pressure to kill bacteria and prevent spoilage, making it the safest option for preserving green beans.
Can I can green beans using vinegar as a preservative?
Vinegar can be used as a preservative for pickling green beans, which is different from canning. Pickling involves soaking the vegetables in vinegar, causing them to become more acidic and resistant to spoilage. However, for traditional canning of green beans, vinegar is not necessary; simply using proper canning techniques with a pressure canner is enough to ensure a safe preservation.
What are the advantages of cold pack canning for green beans?
Cold pack canning, also known as raw pack canning, involves filling jars with uncooked green beans before processing. This method has several advantages, including retaining the beans’ fresh flavor and texture, and it’s typically faster because it skips the pre-cooking step. However, it’s important to follow specific directions for cold pack canning to ensure a safe end product.
How can I add more flavor to canned green beans?
To enhance the flavor of canned green beans, consider adding a small amount of canning or pickling salt to each jar before sealing. Many people also add spices like dill, garlic, or even red pepper flakes to give their beans an extra kick. Experiment with flavors based on your personal preferences, but remember to be mindful of proper canning techniques to ensure food safety.
Do I need to pre-cook green beans before canning them?
Depending on the method you choose, pre-cooking green beans may or may not be necessary. When using the hot pack method, green beans are quickly boiled before being packed into jars, which can help to remove air and limit shrinkage during processing. However, when using the cold pack method, green beans are placed directly into jars without being pre-cooked, which may result in a fresher taste. Both methods can successfully preserve green beans when done correctly.


