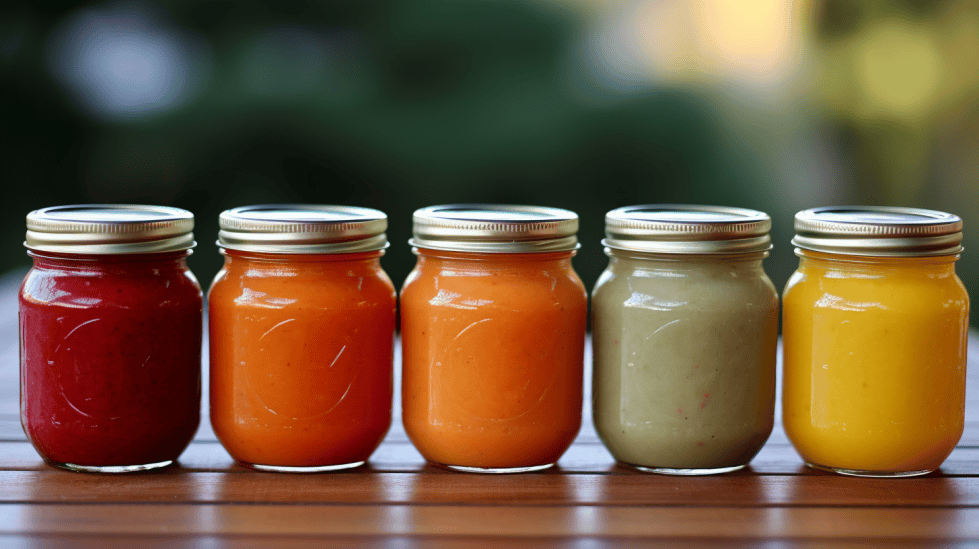
Baby Food Canning Recipes
Baby food canning is an interesting topic for parents looking for healthier and more cost-effective options for feeding their little ones. Homemade baby food is a good alternative to store-bought baby food, as it allows parents to have full control over the ingredients. This article will provide all the necessary information for canning baby food at home, including different recipes and the proper canning process.
Canning baby food involves cooking, pureeing, and sealing food in jars to preserve it. This method helps retain essential nutrients, flavor, and texture in the food. When it comes to creating homemade baby food, it’s essential to have a solid understanding of which foods are suitable for canning and how to safely prepare them for your baby.
Key Takeaways
- Homemade baby food canning offers control over ingredients and nutrition.
- Selecting appropriate foods and understanding the canning process is crucial.
- Safety and proper storage are vital for successful baby food canning efforts.
Understanding Baby Food and Canning
When I started making homemade baby food for my little one, I quickly realized the numerous benefits it offers, such as being more nutritious, economical, and free from chemical additives compared to commercial baby food. As my baby grew and started enjoying a variety of solid foods, I looked for ways to store these homemade meals for future use.
As a parent who makes their own baby food, I understand the importance of using fresh ingredients and providing a wide range of flavors and nutrients for young children. By the time they reach six months of age, babies are usually ready to try different foods like fruits, vegetables, and proteins – this is where baby food recipes come in handy.
When it comes to preserving these meals, one method that I found interesting is home canning. Home canning allows me to store a variety of homemade food for a longer period, ensuring my baby always has a nutritious meal option on hand. However, it is important to be cautious when using home-canned food for babies, as improper canning can risk food poisoning.
Pressure canning is a popular method for preserving low-acid foods, such as vegetables and meats. It uses high heat and pressure to eliminate potential harmful bacteria, making it a safer option for baby’s food. However, some fruit purees like bananas, figs, and melons are not recommended for canning due to their texture and pH levels (source).
In my experience, while home canning can be a great way to store homemade baby food for long-term use, it is essential to follow safe canning practices and procedures. This is particularly crucial when preparing food for young children, as they are more susceptible to foodborne illnesses. By adhering to these precautions, I can be confident that the food I provide to my baby is not only delicious but also safe and healthy.
Basic Tools and Equipment for Baby Food Canning
When it comes to canning baby food, having the right tools and equipment will make the process much more efficient and help ensure you create safe, healthy meals for your little one. In this section, I will go over some of the essential tools and equipment needed for baby food canning.
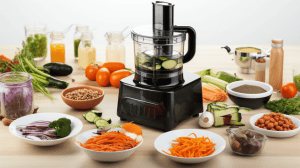
A food processor is a key piece of equipment for making baby food purées. It’s efficient at breaking down cooked fruits and vegetables into a smooth texture, perfect for babies who are just beginning to eat solids. Alternatively, a food mill or baby food grinder can also be used to achieve similar results, though they may lack the power and speed of a food processor.
Ice cube trays are a great way to freeze and store homemade baby food in individual portions. Once the purées are frozen, I like to transfer them into a freezer bag or plastic container for longer-term storage. These small portions make it easier to defrost only what’s needed for each meal.
A steamer basket helps maintain the nutrients of fruits and vegetables when cooking them for purées. Steaming is preferred over boiling, as it preserves more of the essential vitamins and minerals.
When it’s time to can the baby food, a boiling water canner is essential. This large pot is used to heat and process the jars of baby food, ensuring that they are free from harmful bacteria. Additionally, you’ll need canning jars and lids that are specifically designed for this purpose. Be sure to inspect them for any cracks or rust before using.
While not a strict requirement, a potato masher can come in handy for breaking down softer fruits and vegetables, like bananas, avocados, or cooked sweet potatoes. It’s an easy tool for making small batches of purées and can be a helpful addition to your baby food making arsenal.
In conclusion, by equipping yourself with a food processor or mill, steamer basket, ice cube trays, canning supplies, and possibly a potato masher, you’ll be well-prepared for crafting homemade, nutritious, and safe baby food through canning. Happy cooking!
Food Choices for Baby Food Canning
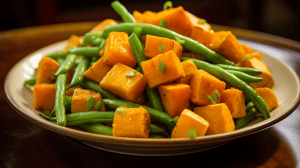
I would like to discuss various food choices suitable for canning homemade baby food, focusing on their nutritional value and safety. Sweet potatoes and green beans can be a great option when making baby food. Not only do they provide essential nutrients, but they are also easy to puree and store.
Fresh fruits and vegetables should always be the foundation of homemade baby food. The best quality, locally sourced produce ensures that your baby is getting the most nutrients possible. Some soft fruits, such as peaches, nectarines, apricots, and plums, are considered safe to can for baby food purposes. However, ripe bananas and other fruits like figs, Asian pears, tomatoes, melons, papaya, and mango should be avoided, as there are no safe recommendations for canning these fruits.
Baby food canning recipes are not limited only to fruits and vegetables. Soft foods like plain yogurt and egg yolks are a nutritious addition to your baby’s diet. However, it is important to note that dairy products and eggs should not be canned, as there is no safe way to do this at home.
Dry beans, once cooked, can also make an excellent choice for baby food. As a rich source of protein, these beans can help fuel your growing infant. Be mindful, though, that beans should be cooked till they are soft and easily pureed for your baby’s consumption.
To sum up, when looking for suitable ingredients for baby food canning recipes, prioritize fresh fruits and vegetables, along with cooked dry beans for protein. Avoid canning fruits like ripe bananas and papayas, as well as dairy products and eggs. By making your canned baby food with the best quality ingredients, you can ensure a nutritious and delicious diet for your little one.
Recipes for Different Stages
In my experience, it’s important to focus on creating recipes that cater to different stages of your baby’s growth. As your child grows, their nutritional needs change, and so should their meals. To make this process easier, I’ll be sharing some of my favorite recipes for different stages, including pureed foods for younger babies and small pieces of food for older babies.
When starting solids, I recommend beginning with single-ingredient veggie purees such as carrot, sweet potato, and green beans. These simple recipes provide a great introduction to solids and are easy to prepare at home. Just steam the veggies until tender, then blend them with some water or breast milk until smooth. Remember to store the leftover purees in the refrigerator for up to two days.
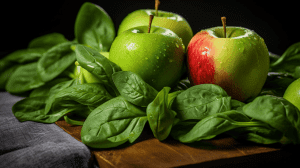
As your baby becomes more comfortable with solid foods, you can move on to baby food purees that combine multiple ingredients. For example, try mixing apples and spinach or sweet potatoes and lentils. These combinations introduce new flavors and provide a more complex nutrient profile for your little one. To make these recipes, simply blend the cooked ingredients together with a little water, breast milk, or formula until smooth. Feel free to explore various combinations to keep your baby’s meals interesting.
When your baby is around 9-12 months, they should be ready to try even more textured meals. At this stage, I like to include ingredients such as small pieces of cooked whole grains, red meats, or soft fruits. Baby purees can include multiple flavors and textures to encourage chewing and promote oral development.

For older babies who are ready to experiment with foods closer to table food, you can dice well-cooked vegetables, fruits, and proteins, and serve them in a bowl. This allows your baby to explore different tastes and textures while still ensuring they get all the necessary nutrients they need for continued growth.
As a parent, I take pride in preparing wholesome and nutritious meals for my child. Armed with these recipes and tips, you can also confidently navigate the different stages of your baby’s food journey.
The Cooking and Canning Process
As a parent, I understand that ensuring the safety and health of homemade baby food is a top priority. One great way to preserve fresh baby food is through canning. Let me walk you through the cooking and canning process of baby food.
Before I begin, it is essential to remember that breast milk or formula should be the main source of nutrition for babies under six months, and new food should be introduced gradually.
During food preparation, I make sure to wash fresh fruits and vegetables properly. I then cut them into small chunks and cook the foods until tender to protect vitamin C content. While some foods require high heat, like cooking on the stovetop, others can be simply steamed or baked to maintain nutrients and texture. I usually add a small amount of water while cooking to speed up the process and help with pureeing.
After cooking, I let the foods cool to room temperature. Once cooled, I blend them into a smooth puree, being careful not to make it too thin. I then heat the blended foods to boiling and simmer for ten minutes. I do this because exposing the food to high heat during the canning process is crucial for killing any harmful bacteria.
When it’s time for canning, I first prepare the jars and lids according to the manufacturer’s guidelines. I pour the hot puree into clean, sterile jars, leaving a small headspace to allow for expansion during processing. To remove air bubbles, I gently tap the jar on the countertop.
I process the jars in a water bath canner, following the correct procedures and timing for each specific food. This ensures that the canned baby food is safe and retains its nutritional content.
Serving homemade canned baby food is relatively simple. A few hours before serving time, I transfer the desired amount of food into a bowl and let it reach room temperature. If needed, I can also warm the food in a hot water bath, stirring it occasionally to ensure even heat distribution.
In conclusion, preparing, cooking, and canning homemade baby food might seem intimidating initially, but it is a rewarding way to provide your baby with nutritious and safe food. By following proper canning techniques and paying attention to food safety, you can offer a wide variety of delicious, healthy meals for your baby.
Storing, Thawing and Serving Homemade Baby Foods
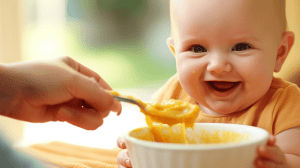
I absolutely love making homemade baby food for my little one. But it’s also important to safely store, thaw, and serve the baby food when it comes to feeding time. I prefer the ice cube tray method for storing my baby’s meals. I simply pour the pureed food into ice cube trays, cover it with plastic wrap, and then put the trays in the freezer.
Once the baby food cubes are completely frozen, I transfer them to resealable freezer bags. This way, I can easily organize the various types of baby food I’ve prepared and have them readily available. It’s also helpful for when I attend a baby shower and prepare homemade baby food as a unique and thoughtful gift.
When it’s time to serve my baby their meal, I select the desired frozen cubes and thaw them in the fridge or by using a gentle heat source like a warm water bath. If the recipe I used called for the addition of small pieces of solid ingredients—such as soft fruits or cooked vegetables—I mix those in after thawing to ensure a proper texture.
When it comes to storing larger servings, I use pint jars with air-tight lids, ensuring that the jars are freezer-safe. These are perfect for freezing soups and stews that can be served to the rest of the family as well.
It’s always good practice to label and date the freezer bags and pint jars before storing them, as this allows me to keep track of how long the baby food has been stored. Generally, unused portions can be stored in the freezer for up to three months. While freezer time is for quality purposes only, I prefer to follow these guidelines to provide the freshest meals for my baby.
To recap, storing, thawing, and serving homemade baby foods is easy and convenient when using methods like the ice cube tray method, freezer bags, or pint jars. By following these practices, I can ensure that my baby’s meals are healthy, delicious, and safely stored.
Safety Concerns in Baby Food Canning
I want to emphasize the importance of safety when canning baby food at home. Food poisoning and infant botulism are genuine risks if the canning process isn’t followed correctly. It is crucial to follow standard processing procedures to ensure the utmost safety for your little one.
When attempting to can baby food, remember that home canning equipment, even pressure canners, cannot reach the same temperatures and pressures as commercial equipment. This means that it may not be safe to can some types of baby food, such as pureed vegetables, red meats, or poultry1. Additionally, it is always advised to boil home-canned foods for at least 10 minutes before serving to ensure safety and a further reduction in potential contaminants2.
One essential aspect of canning is maintaining a high heat during the process. This high heat helps to kill harmful bacteria and reduce the risk of food poisoning or infant botulism. Botulism is a particularly dangerous concern, as it can be deadly3. That’s why high heat and proper processing methods are of primary importance when making and preserving homemade baby food.
To minimize risks and ensure high-quality baby food cans, I recommend following these guidelines:
- Use fresh, clean ingredients without any signs of spoilage.
- Sterilize all jars and lids before use.
- Use appropriate processing methods for the type of food you’re canning (pressure canning for meats and low-acid veggies, water bath canning for high acid fruits).
- Be attentive to processing times and temperatures, ensuring that they are consistent throughout the canning process.
By following these safety guidelines and always being mindful of the risks, I can confidently provide nutritious and delicious homemade baby food for my little one while minimizing the possibility of foodborne illness.
Footnotes
Advantages of Homemade Baby Food
As a parent who has tried making homemade baby food, I can confidently say that it’s a great resource for wholesome and nutritious meals for my little one. When I make my own baby food, not only am I in full control of the ingredients, but it also gives me the opportunity to introduce my baby to a wide range of flavors and textures right from the beginning.
One significant advantage of making homemade baby food is that I can ensure my baby’s meals are free from food allergies or intolerances. By selecting fresh, organic ingredients that suit my baby’s needs, I know exactly what goes into each meal, minimizing the risk of an allergic reaction.
Another reason why I find homemade baby food to be a great idea is the ability to include fresh ingredients that are full of essential nutrients and vitamins. Fresh food generally contains higher nutritional value compared to commercially-prepared baby foods that can sometimes contain added preservatives, salt, or sugar.
An easy way to enrich my baby’s diet and introduce them to different baby foods has been through homemade baby food recipes. I find that I can be creative, mix-and-match different ingredients, and tailor the meals to my baby’s taste preferences.
From my experience, exploring homemade baby food options has not only been a great way to ensure my baby gets nutritious meals but also helped me create a strong foundation for my child’s eating habits as they grow older. I can now say that embracing homemade baby food has been a rewarding and worthwhile journey for both my baby and me.
Frequently Asked Questions
What is the safest method for canning vegetable purees?
Although it might be tempting to can pureed vegetables for convenience, it’s not recommended due to safety concerns. Pureed vegetables, red meats, and poultry haven’t had proper processing times determined for home use. Instead, I suggest canning and storing these foods using standard processing procedures and then pureeing or blending them when it’s time to serve. source
How long does canned fruit puree last?
When properly canned and stored, fruit purees can last up to a year or more. Over time the quality of the purees may decline. To ensure the best taste and quality, I recommend consuming canned fruit purees within a year of canning. Remember to store them in a cool, dry place away from direct sunlight.
Which baby food stages are ideal for canning recipes?
Canning is most suitable for baby food at stages where fruits and some vegetables are appropriate. Fruit purees are easier to can safely – just follow the procedure for canning each fruit as mentioned in Guide 2 of the USDA Complete Guide to Home Canning.
Can carrot puree be safely canned?
It’s not recommended to can pureed vegetables like carrot puree due to safety concerns. Instead, you can safely can and store whole or sliced vegetables, including carrots, using established procedures. Then, when it’s time to serve, puree or blend the vegetables as needed.
What factors affect the shelf life of homemade canned baby food?
The shelf life of canned baby food depends on various factors, such as the quality of the ingredients, proper canning techniques, and storage conditions. Ensuring that your jars are well-sealed and stored in a cool, dark place can help prolong the shelf life of your canned baby food. Always inspect the jars for signs of spoilage before serving and discard any that look or smell off.
Are there any recommended sources for trusted baby food canning recipes?
The National Center for Home Food Preservation is a reliable source for canning recipes, including those suitable for baby food. They provide guidelines for safely canning fruit-based baby foods. Additionally, Bernardin’s Baby Food Fruit Purée recipe can also be a great resource for fruit puree canning. Always follow guidelines from trusted sources to ensure the safety of your homemade canned baby food.


