How Much Water in Pressure Cooker for Canning
Canning is a popular method for preserving a wide variety of foods, but for many home cooks, navigating the ins and outs of using a pressure cooker for canning can feel a bit overwhelming. It’s essential to know how much water to use in the pressure cooker to ensure proper cooking and sterilization of canned goods. Generally, pressure cookers require 2 to 3 quarts of water in order to generate the necessary steam and maintain the desired pressure.
Understanding the basics of canning and the differences between water bath and pressure canning techniques is important for successful preservation of your fruits, vegetables, and meats. This article will cover the steps for pressure canning, and how to monitor and adjust pressure to ensure safety and effectiveness during the canning process. Don’t worry, with a little practice and guidance, you’ll be a pro at preserving your favorite foods using a pressure cooker in no time.
Key Takeaways
- Pressure cookers require 2 to 3 quarts of water for proper canning.
- It’s important to understand the basics of canning and differences between water bath and pressure canning techniques.
- Monitoring and adjusting pressure during the canning process is crucial for food safety and preservation success.
Understanding the Basics of Canning
The Role of Water in Canning
When it comes to canning, I have learned that water plays a crucial role in the process. Its primary purpose is to generate enough steam, which helps raise the temperature inside the pressure canner. Generally, about 2 to 3 inches of water should be put in a pressure canner. If the amount of water is not sufficient, it can lead to a failed attempt and even ruin both the canned food and the canner itself.
Additionally, water acts as a heat transfer medium and ensures that the food reaches the right temperature for safe preservation. Having enough water in the pressure canner is vital because a low water level can lead to under-processing, resulting in unsafe canned food. Moreover, longer processing times may require more water, as mentioned in this source.
The Importance of Correct Pressure in Cooking
Adjusting and maintaining the correct pressure in the pressure canner is crucial for the safety and quality of the preserved food. The pressure valve should be set accurately, as it helps in controlling the pressure inside the cooker. Maintaining the appropriate pressure ensures that the temperatures inside the canner rise above the boiling point of water, which is essential for preserving low-acid foods.
I’ve found that using a low setting on the pressure cooker while canning can be dangerous. Low pressure could result in the inability to kill off harmful bacteria like Clostridium botulinum, which may cause foodborne illnesses. To avoid such scenarios, it’s essential to follow the recommended guidelines and use the appropriate pressure setting for the specific type of food being canned.
To sum up, the amount of water, proper pressure, and accurate use of the pressure valve all contribute to successful and safe canning results. By understanding the role of water and the importance of correct pressure while canning, I can be more confident and proficient in preserving food at home.
The Process of Water Bath Canning
Preparing Your Canning Jars

Before I begin water bath canning, I gather all the necessary supplies, such as high-acid foods, canning jars, and a boiling water bath canner. Water bath canning is best suited for preserving high-acid foods like fruits, tomatoes, and pickles. First, I thoroughly wash the canning jars with hot soapy water to ensure they are clean and free from any residue. This step is essential as it helps to prevent bacteria growth during the canning process.
The Key Steps in Water Bath Canning
- Fill the boiling water bath canner with water: I fill the canner with enough water to cover the jars by at least one to two inches once they are submerged.
- Heat the water: Next, I place the canner on the stove and turn the heat on, adjusting it as needed. I bring the water to a gentle simmer, around 180°F for hot packing and 140°F for raw packing.
- Prepare the high-acid foods: While the water heats up, I prepare the food I intend to can (e.g., peeling and cutting fruits or chopping vegetables). I make sure to follow a tested recipe to guarantee safe preservation.
- Fill the jars: Once my chosen high-acid foods are ready, I fill the clean jars, ensuring the recipe’s recommended headspace is maintained for proper sealing during the process.
- Place jars in the canner: Carefully, using a jar lifter, I place the jars into the boiling water bath canner, making certain that they are not touching each other or the sides of the canner.
- Process the jars: I set a timer according to the processing time specified in the recipe and leave the jars submerged in boiling water for the recommended duration.
- Remove and let the jars cool: After the processing time is complete, I turn off the heat, remove the jars with the jar lifter and place them onto a towel or cooling rack to cool. Seals on cooled jars make a popping sound, indicating a successful seal has formed.
By following these crucial steps in water bath canning, I can safely preserve my high-acid foods, ensuring that they have a shelf-stable, enjoyable quality for longer periods.
Pressure Canning and Its Perks
As a home cook, I’ve found that pressure canning is an efficient and secure method for preserving low-acid foods, such as vegetables, meats, and poultry. Utilizing high temperatures, pressure canning protects the contents in the jar from spoilage and ensures their safety when consumed.
How to Use a Pressure Cooker with Canning
When it comes to using an electric pressure canner for canning, having the right amount of water in the canner is crucial. Based on my experience, I typically use around 2 to 3 quarts of water when pressure canning. The water’s primary function is to generate steam and maintain the desired pressure, achieving even heat distribution and thorough sterilization of the jar’s contents.
Before starting the canning process, I make sure that my electric pressure canner has enough space to accommodate pint jars or even quart jars standing upright. It’s an absolute necessity for preserving food properly.
Here are some tips I’ve gathered on how to use an electric pressure canner effectively:
- Choose the appropriate canner size: Select an electric canner with a capacity that fits your needs. For instance, a 7-quart canner usually requires 1.5 quarts of water, a 10-quart canner needs 2 quarts of water, and a 16-quart canner uses around 3 quarts of water.
- Fill the jars: Pack the food tightly but leave some headspace, as advised in the recipe, to prevent the jars from overflowing during the canning process.
- Place the jars inside the canner: Arrange the jars on the canning rack. Do not let the jars touch one another or the sides of the canner.
- Start the canning process: Close and lock the canner. Follow the manufacturer’s instructions and recipe guidelines for processing time and pressure levels.
In conclusion, by using a pressure canner correctly and following proper guidelines for each specific food type, I can ensure that my home-canned goods are preserved safely and efficiently.
Essential Supplies for Canning
When it comes to canning, having the right supplies and equipment can make all the difference. In this section, I’ll cover the essential tools you’ll need for successful canning and the safety features to consider when choosing a pressure cooker.
Tools Used in Canning
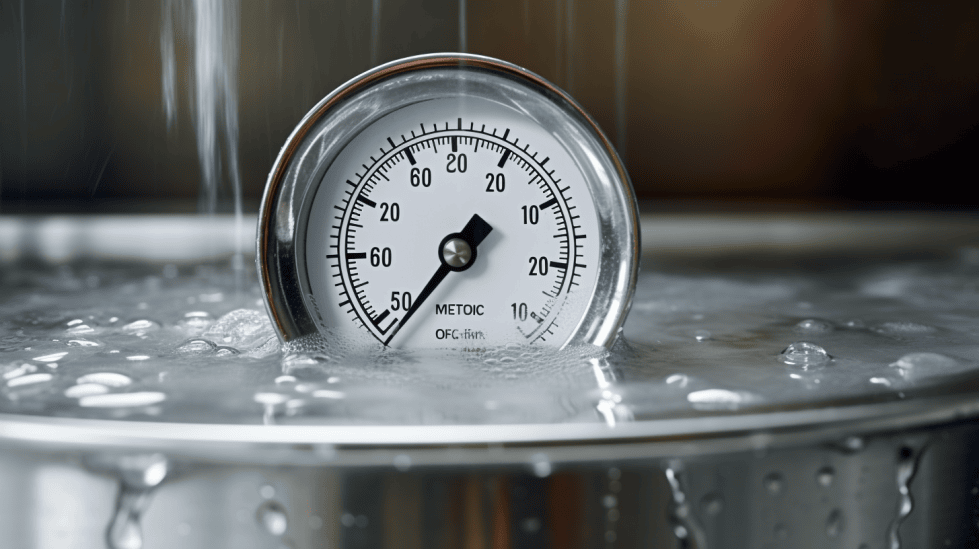
The first thing on my list is a good-quality pressure cooker. For many canning recipes, a pressure cooker is necessary to ensure the food is processed safely. A dial gauge canner is a good investment, as it can help you monitor the pressure accurately and ensure the food inside is being cooked properly.
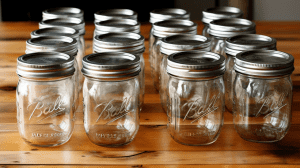
Next, I recommend having an assortment of canning jars, such as half-pint, pint, and quart jars, depending on the type and amount of food you’re canning. You’ll also need matching lids and bands for these jars to ensure a proper seal. Quart jars are particularly useful for larger quantities or bigger pieces of produce.
Additional tools to have on hand include:
- A jar lifter for safely removing hot jars from the canner
- A lid wand to easily lift lids out of hot water
- A non-metallic bubble remover for releasing air bubbles trapped in the jars
- Oven mitts or heat-resistant gloves to protect against burns
- A canning funnel with a wide mouth to aid in filling the jars
Safety Features to Consider in Pressure Cookers
When choosing a pressure cooker for canning, it’s essential to consider the safety features it offers. Some of these features are especially important for canning, while others simply make using the pressure cooker easier and more convenient. Here are a few safety features to look for:
Pressure regulator: A pressure regulator is essential for maintaining the correct pressure inside the canner. It can either be a weighted gauge or a dial gauge. Make sure to choose one that is compatible with your specific pressure canner and follow the manufacturer’s instructions for use.
Steam vent: A steam vent allows excess pressure to be released from the canner, preventing a dangerous situation if the pressure gets too high. Some pressure cookers also have a locking feature to ensure the lid cannot be removed while there is still pressure inside.
Jar rack: A jar rack keeps the jars elevated off the bottom of the pressure cooker, ensuring proper circulation of steam and even heating around the food. It also protects against jars rattling or cracking during processing.
To sum it up, canning requires a few essential tools and safety features, such as a pressure cooker with a dial gauge, jars of various sizes, a jar lifter, and a pressure regulator. By investing in these items and following safety guidelines, I can have peace of mind knowing that my home-canned foods are safe and delicious.
Common Issues Encountered in Canning
Seal Failure and How to Avoid It
One common issue I’ve encountered in canning is seal failure. This can be caused by air bubbles, food residue, or nicks on the jar rim, which prevent the airtight seal necessary for safe canning. To avoid this, I always inspect the jar rims for any imperfections before starting the canning process. Additionally, I make sure to wipe the rims clean of any food particles after filling the jars.
Air bubbles are another major contributor to seal failures. To prevent them, I use a non-metallic utensil to remove air bubbles after filling the jars with food. This ensures a better seal and reduces the risk of seal failure.
When putting the lids on the jars, it’s important not to overtighten the screw bands. I’ve found that finger-tightening is sufficient to achieve a good seal without risking the jar contents overflowing during the canning process.
Pro Tips to Achieve Best Results
As a seasoned canner, I have some pro tips to achieve the best results and prevent common canning issues:
-
Choose the right pounds pressure: It’s essential to follow the recommended pounds pressure for each specific recipe. This ensures safe canning and prevents over-processing or under-processing the jars of food.
-
Monitor the pressure canner lid: Keep an eye on the vent pipe in the pressure canner lid when canning. Let it vent for 10 minutes before placing the weights on to start building pressure. This helps to build up the necessary pressure inside the canner.
-
Stacking jars properly: When using a pressure canner, make sure not to stack quart jars on top of each other. You can stack pints or half-pints, but only with the use of a canner rack between the layers.
-
Adhere to the correct water level: Follow the manufacturer’s guidelines on the appropriate water level in the pressure canner. Too little water can lead to the pot boiling dry, while too much water does not usually cause harm but is not necessary for proper canning.
By following these tips and being mindful of potential issues, I’ve had great success in canning food safely and achieving an airtight seal for long-term storage.
Canning Various Foods

Canning Low Acid Foods
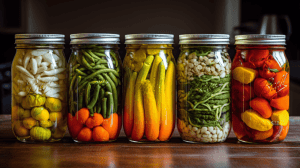
When it comes to canning low acid foods like fresh vegetables and meats, I find it crucial to use a pressure canner. This method ensures the food is safe to consume, as pressure canners can reach higher pressures than regular pressure cookers. For instance, green beans are a common low acid food that benefits from pressure canning.
Preparing the low acid foods for canning involves washing and cutting them into the desired sizes. Once the food is ready, I usually add an acidic component like lemon juice to help preserve the color and texture, although it’s not mandatory. The canning process begins by placing the food into sterilized jars, leaving some headspace for expansion and sealing.
When setting up the pressure canner, I make sure to add 2-3 inches of water before placing the filled jars on the rack. Following the manufacturer’s instructions, I then bring the water to a simmer and adjust the processing time and pressure accordingly, ensuring that the canning process is safe and efficient.
Canning High Acid Foods

High acid foods, such as fruits, pickles, and jams, don’t require pressure canning. Instead, I use a water-bath canning method to preserve these types of food products. The process starts with clean jars, which can be warmed in a water bath to prevent breakage from temperature fluctuations.
Once the jars are filled with the high acid food, I place them into the pot, ensure that there’s enough water to cover the jars by at least an inch, and then bring the water to a rolling boil. The processing time depends on the specific food, recipe, and altitude, but usually ranges from 10 to 30 minutes.
As a tip, I always check the seal on the jars after they have cooled. If the lid has not sealed properly, I either reprocess the jar or refrigerate it and consume the food within a few days.
By following these guidelines for canning low and high acid foods, I can confidently preserve a variety of food products in my own kitchen, ensuring their safety and freshness.
How to Monitor and Adjust Pressure for Canning
Monitoring the Heat Source

When I use a pressure canner, I know it is crucial to continuously monitor the heat source. Maintaining proper heat helps to achieve and maintain the correct pressure during the canning process. I always regulate the heat by adjusting my stove’s burner knob. It’s essential to remember that fluctuations in pressure can affect the safety and quality of the canned food. So, I make sure to keep an eye on the pressure reading, whether it be through a dial gauge or a weighted-gauge.
The Importance of Correct Water Level
One of the key factors during pressure canning is maintaining the right water level in the canner. Making sure there is enough water prevents the canner from running dry, which can damage the canner and jeopardize my canned goods. Since each pressure canner model has its own water level requirement, I always refer to the manufacturer’s instructions to determine how much water to add. Based on my experience, it is a vital practice to regularly check the water level during the canning process, especially for longer canning sessions.
Adapting to Higher Altitudes

Living in higher altitudes can affect the pressure canning process, as increased elevation requires adjustments to maintain the right pressure. The temperature at which water boils is lower at higher altitudes, so I need to increase the processing time or pressure to safely can my foods. I’m aware that the processing times and methods often need adjustment for altitudes above 1,000 feet. To make precise altitude adjustments, I consult my canner’s user manual or reliable resources such as the National Center for Home Food Preservation.
Pressure Cookers for Canning
Different Types of Pressure Cookers
When it comes to pressure cookers for home use canning, there are several types to choose from. These include steam canners, weighted gauge canners, and gauge pressure canners. While all of these types can be used for canning, they each have their own unique characteristics.
Steam canners are a relatively new and popular option for canning. They use steam to build up pressure and heat inside the canner, processing and preserving the food. Many people prefer steam canners because they’re lightweight and easy to use.
Weighted gauge canners function by using a weight to regulate the pressure inside the canner. These are often regarded as a more accurate and reliable method of canning because the pressure remains consistent. They’re also highly preferred for their durability and straightforward operation.
Gauge pressure canners are equipped with a pressure gauge that indicates the level of pressure inside the canner. This type of pressure cooker is great for those who want more precise control over their canning process. However, the gauge must be checked for accuracy regularly, which can be somewhat inconvenient.
Another option for canning is electric pressure cookers, like the Instant Pot. Although some electric pressure cookers may not be explicitly designed for canning, they can still be used for preserving if they meet certain criteria – one of which is the Instant Pot Max.
Instant Pot Max: A Review
The Instant Pot Max is a versatile electric pressure cooker designed specifically for canning, among other uses. It boasts a maximum pressure of 15 PSI, which is needed for safe canning of low-acid foods. The Instant Pot Max also has an automatic pressure-release valve, allowing for a more hands-off approach to canning.
This pressure cooker offers the convenience of multiple functions, including pressure cooking, slow cooking, sautéing, and more. Its digital display and smart controls make it user-friendly and easy to monitor the canning process.
While the Instant Pot Max is a great tool for canning at home, some may argue that it’s not as suitable for larger-scale canning compared to traditional stove-top pressure canners. Nevertheless, for someone looking for a convenient, all-in-one appliance that can handle a variety of tasks, including canning, the Instant Pot Max is definitely worth considering.
Frequently Asked Questions
How much water is needed for a 23-quart canner?
For a 23-quart pressure canner, I recommend using about 2 to 3 quarts of water to generate the necessary steam and maintain the desired pressure. This amount of water ensures even heat distribution, proper cooking, and sterilization of the contents. However, always follow the manufacturer’s instructions for specific canner models.
What is the water requirement for a 7-quart canner?
In a 7-quart pressure canner, I suggest using around 2 to 3 quarts of water as well. Again, this might vary depending on the canner’s model. So, please consult the manufacturer’s instructions before using the canner.
Should jars be fully submerged in water?
No, the jars should not be fully submerged while using a pressure canner. The main purpose of the water is to generate steam and create pressure. As long as there is enough water to do that, the jars should be fine.
What are the consequences of too little water in a canner?
Too little water in a pressure canner can cause uneven heat distribution and may not generate sufficient pressure, leading to under-processed and potentially unsafe foods. Adequate water ensures proper cooking and sterilization of the contents inside the jars.
Can overfilling a pressure canner cause problems?
Yes, overfilling a pressure canner can lead to issues as well. If there’s too much water, it might take longer for the canner to reach the required pressure, and the excess water may overflow or cause the canner to spurt. It’s crucial to stick to the recommended water levels to avoid any such problems.
What is the minimum jar load for water bath canning?
For water bath canning, the minimum jar load depends on the size and capacity of your canner. Typically, the canner should be able to hold at least four-quart jars standing upright without any space constraints. This ensures the process is done safely and efficiently.


