Dehydrating chili is an excellent way to preserve the flavor and heat of chili peppers while extending their shelf life. When done properly, it provides a convenient ingredient for various recipes and allows you to enjoy the taste of chili all year round. The process not only involves drying the peppers themselves, but also understanding the type of peppers you are working with and choosing the right dehydration method.
Before diving into the dehydration process, it is crucial to familiarize yourself with the specific chili peppers you plan to dehydrate. Chilies come in a wide range of heat levels and flavors, which can affect the end result significantly. Equally important is selecting the right dehydrator for the task, as this ensures even and consistent drying, further improving the quality of your finished product.
Finally, the dehydration process itself should be approached with care, as different factors like time, temperature, and preparation can greatly impact the outcome. Once your chilies are successfully dehydrated, proper storage and usage are vital to ensure that your dehydrated chili remains flavorful and safe to consume in the long run.
Key Takeaways
- Dehydrating chili extends shelf life and preserves flavor for year-round enjoyment.
- Choose the right dehydrator and understand the type of chili peppers you’re working with.
- Factors like time, temperature, and preparation affect the quality of dehydrated chilies.
Understanding Peppers

The Varieties of Chili Peppers
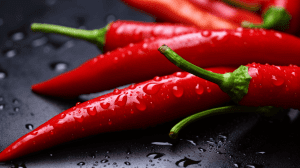
There are numerous types of chili peppers available to choose from, and each one has its unique characteristics. Some of the most popular chilies include bell peppers, banana peppers, and various hotter peppers like jalapenos, habaneros, and ghost peppers. Each type of chili pepper brings something different to your dish, from mild flavor to extreme heat.
Hot Chili Peppers
When it comes to hot chili peppers, the heat level is mostly determined by the amount of capsaicin present. Hotter peppers like habaneros and ghost peppers contain significantly more capsaicin compared to milder options like jalapenos. These fiery chili peppers are ideal for those who are looking to add a spicy kick to their dishes, while beginners might want to start with something milder before moving on to hotter varieties.
Sweet Bell Peppers
Sweet bell peppers, on the other hand, are known for their mild, sweet, and fruity flavors rather than heat. They come in a variety of colors, such as green, red, yellow, and orange. Bell peppers are versatile, as they can be used in a wide range of dishes – from salads to stir-fries and even stuffed with various fillings.
Thicker Versus Thinner Peppers
The thickness of a chili pepper’s walls can affect the overall dehydration process. Thicker peppers, like bell peppers, take longer to dehydrate because they have more moisture content to evaporate, while thinner peppers like cayenne and Thai bird’s eye chili, dry more quickly. When dehydrating different types of peppers, it’s essential to keep this in mind and adjust the drying time accordingly to achieve optimal results.
Importance of Choosing the Right Dehydrator

Food Dehydrator Versus Air Fryer
In my experience, using a food dehydrator is the most effective way to preserve the flavors and nutrients of chili peppers. While an air fryer can also be used for dehydrating, it is not specifically designed for this purpose, and I have found that it can provide inconsistent results. The controlled and consistent heat provided by a food dehydrator allows for even drying, preserving the flavors and nutrients of the chili peppers much better than an air fryer.
Dehydrator Trays
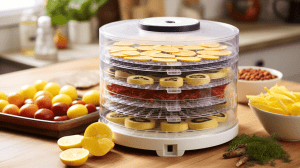
Choosing the right dehydrator is critical. When I dehydrate chili peppers, I look for a food dehydrator that comes with ample, easy-to-clean dehydrator trays. This ensures that there is enough space to evenly spread out the chili peppers, allowing the heat to distribute properly, resulting in evenly dried chilies.
In addition, the design of the dehydrator trays should allow for good air circulation. This helps to remove moisture and prevent any bacterial growth. I have found that dehydrated chili peppers with a thick flesh, such as habaneros and Carolina Reapers, require a food dehydrator with a higher wattage output for better results.
I recommend using a food dehydrator with an output of at least 240 watts and adjustable temperature settings to ensure even and efficient drying of the chili peppers. The trays should be dishwasher safe, which greatly simplifies the cleaning process.
In conclusion, choosing the right food dehydrator with suitable trays significantly impacts the quality and preservation of chili peppers. Opting for a device specifically designed for dehydration with adjustable temperature settings, ample cleanable trays, and proper wattage will result in better-dried chilies for various culinary uses.
The Dehydration Process
Preparation of Chili Peppers
Before starting the dehydration process, it’s important to properly prepare the chili peppers. First, I wash my chili peppers thoroughly with water and then cut off their stems. Next, I slice the chilies in half lengthwise to help with even drying. Some people prefer to keep the seeds in place, but I like to remove some or all of the seeds, depending on how spicy I want my final product to be.
Drying Time and Temperature
As for the drying time and temperature, I found that the optimal settings depend on the type of dehydrator or method being used. When I use my food dehydrator, I set the temperature between 113 and 122 degrees F. The drying time can vary, but generally, I have seen that it takes:
- 4-5 hours for smaller, thin-walled peppers
- 8-10 hours for larger, thicker-walled peppers
Keeping the temperature on the lower side, closer to 113 degrees F, might result in a longer drying time, but it can help preserve the flavor and spiciness of the peppers.
Checking the Dryness
It is essential to check the dryness of the chili peppers throughout the dehydration process. I usually start inspecting the peppers after 4 hours and then every couple of hours afterwards. Peppers are considered to be fully dehydrated when they become brittle and appear dry. The texture should be similar to that of dried fruit.
By following these steps and closely monitoring the drying time and temperature, I always end up with perfectly dehydrated chili peppers that can be used for various recipes and purposes.
Storing Dehydrated Chili

Airtight Containers
When storing dehydrated chili, I always make sure to use airtight containers to maintain its freshness. This helps keep the flavors intact and prevents any moisture from entering and causing spoilage. Glass jars, plastic containers, or vacuum-sealed bags are all great options for keeping your chili safe and fresh. PepperScale recommends using airtight containers for dried peppers, too.
Dry Place
Another crucial factor for preserving dehydrated chili is storing it in a dry place. Excess moisture can compromise the quality and even encourage mold growth. I always store my chili containers in a cool, dark cupboard that is separate from any sources of heat or direct sunlight. Ideally, the storage space temperature should be slightly below room temperature, between 60 and 70°F as suggested on Foodal.
Shelf Life
The shelf life of dehydrated chili is quite impressive. As long as I keep mine stored in an airtight container, in a dry place, my dried chili peppers can last for a few years. However, the flavor intensity may decline over time. I generally use my dehydrated chili within a year to ensure optimal flavor when cooking my favorite spicy meals.
Utilising Dehydrated Chili
Grinding for Chili Flakes or Powder
One great way to utilize dehydrated chili is by grinding it into chili flakes or chili powder. I find that using a coffee grinder works best for this process, as they are designed to break down different types of beans and seeds. Simply place the dried chilies in the grinder and pulse until they reach the desired consistency. This can result in your own special chili pepper flakes or powder that can be used as a spicy addition to a variety of dishes.
Reconstituting with Hot Water
Another option for using dehydrated chili is to reconstitute it with hot water. This technique involves placing the dried chili peppers in a bowl and covering them with hot water for around 15-20 minutes until they become soft and pliable. Once reconstituted, I usually chop them up and incorporate them into various dishes such as soups, stews, and sauces. This method is particularly useful in recipes that call for a chili “paste” or when you don’t have access to fresh chili peppers.
Incorporating into Dishes
Dehydrated chili can also be directly incorporated into a multitude of dishes without any additional preparation. For instance, when creating my own chili recipe, I often add the dried chili flakes or powder directly to the pot, allowing the heat and liquids to rehydrate and infuse the chili flavor into the dish. Moreover, using chili powder or flakes in place of fresh chilies can add an interesting depth of flavor that may not be achieved otherwise.
Besides chili recipes, dehydrated chili can be a delicious complement to hot sauces where it can enhance the overall spiciness and flavor profile. I find that the versatility of dehydrated chili peppers allows me to experiment with different combinations and create unique dishes that showcase the robust and distinct flavors of each chili variety.
Dehydrating Additional Ingredients
Dehydrating Ground Beef

In my experience, dehydrating ground beef is an essential step for making a delicious and easily rehydratable chili. First, I cook the ground beef thoroughly, breaking it up into small pieces with a spatula. For better rehydration, I often mix breadcrumbs into the beef before cooking. This can be done easily using a food processor, which helps incorporate the breadcrumbs evenly throughout the meat.
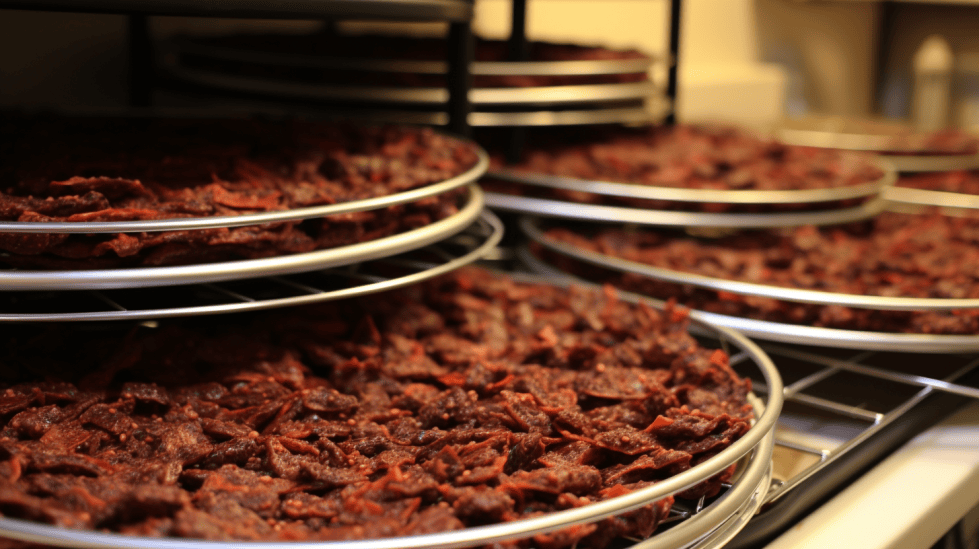
Once cooked, it’s crucial to drain the fat from the ground beef using a colander. Excess fat can decrease the shelf life of dehydrated foods and make it harder to rehydrate later. After draining the fat, place the ground beef in thin layers on your dehydrator’s trays, making sure to leave space for airflow.
I set the dehydrator’s temperature to about 113-122°F and preheat for ten minutes, as mentioned by Foodal. The drying time will vary depending on several factors, including the beef’s moisture content and the dehydrator’s efficiency. Keeping an eye on the progress, I usually dehydrate the ground beef until it’s dry and crumbly, which can take around 6-8 hours.
Using a Baking Sheet for Other Vegetables
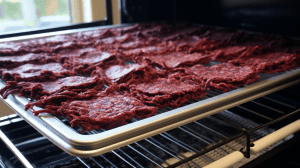
For other vegetables in my chili, such as onions, peppers, and tomatoes, I found it helpful to use a baking sheet when dehydrating them. This method is particularly useful if you don’t have a dehydrator or if your dehydrator doesn’t have enough space for all the ingredients.
Before placing the vegetables on a baking sheet, I make sure they’re cut into small, uniform pieces. This helps them dry evenly and facilitates rehydration. Depending on the vegetables’ thickness, I spread them out in a single layer on the baking sheet, ensuring they don’t overlap.
I preheat my oven to its lowest setting, typically around 170-200°F. Then, I place the baking sheet in the oven, with a slightly open oven door to allow moisture to escape. The dehydrating process can take several hours, depending on the vegetables and oven temperature. I monitor the progress closely to ensure the vegetables don’t over-dry or burn.
Using the dehydrated ground beef and other vegetables, I can then create a variety of delicious chili recipes that can easily be rehydrated for future meals.
Potential Challenges in Dehydrating Chili
Dealing with High Water Content
One of the challenges I face when dehydrating chili is dealing with their high water content. Chilies, like many other fruits and vegetables, contain a significant amount of moisture, which can make the dehydration process more time-consuming and complicated. To effectively remove moisture, I spread the chilies out evenly on the dehydrator trays, making sure not to overcrowd them. In some cases, I also pat them dry with a paper towel before placing them in the dehydrator to speed up the process.
Guessing the Right Drying Time for First Time Users
As a first-time user, figuring out the right drying time for chilies can be a challenge. Drying times may vary depending on the type and size of the chili, as well as the dehydrator’s settings. I recommend starting at a temperature of 135-140 degrees F and monitoring the progress regularly. It’s essential to observe the chilies and adjust the time accordingly to avoid over-drying or under-drying them.
Issues with Peppers Sticking on Parchment Paper

Another problem I may encounter when dehydrating chilies is that they can sometimes stick to the parchment paper. To prevent this issue, I make sure to turn and move the chilies around on the parchment paper periodically during the dehydration process. This helps keep the chilies from sticking and ensures that they dry evenly. If the sticking persists, I can also consider using non-stick dehydrator sheets or silicone mats to avoid this problem altogether.
Frequently Asked Questions
How long does it take to dehydrate chili peppers?
In my experience, the length of drying time for chili peppers varies based on factors like the type and amount of chilies, external temperatures and humidity levels, altitude, and the power of the dehydrator. You can generally expect the process to take anywhere from a few hours to a couple of days. Keep an eye on the progress, and don’t worry about drying them too long source.
What is the best method for dehydrating chilies?
There are three popular methods for dehydrating chilies: using a food dehydrator, oven, or air drying. I find using a food dehydrator to be the most efficient and reliable method. It maintains a consistent temperature and airflow, which prevents over-drying or uneven dehydration source. However, the other methods can also be effective if done correctly.
Can you dehydrate canned chili?
I would not recommend dehydrating canned chili. Canned chili typically contains a lot of added moisture, which would make the dehydration process lengthy and challenging. Instead, focus on dehydrating fresh or store-bought chili peppers to ensure the best results.
What are some dehydrated chili recipes for backpacking?
One popular recipe for backpacking is dehydrated chili con carne. To make this, dehydrate cooked ground beef, bell peppers, onions, tomatoes, and chili peppers separately. Combine the dehydrated ingredients with your preferred spices, such as chili powder, cumin, and garlic powder. When you’re ready to eat, simply rehydrate the mixture with boiling water and let it sit for 15-20 minutes before digging in.
How do you store dehydrated chili for long-term use?
To store dehydrated chili, I recommend sealing it in a vacuum-sealed or airtight container. This will keep the chili from absorbing moisture and prolong its shelf life. Store the container in a cool, dry, and dark place away from direct sunlight. Properly stored dehydrated chili can last for several months, or even years, depending on the quality and conditions source.
Is it possible to dehydrate chili sauce?
While dehydrating chili sauce is technically possible, I would not recommend it due to the high moisture content and the presence of added ingredients that may alter the flavor during the dehydration process. Instead, focus on dehydrating chili peppers and then grinding them into a powder to create your own dried chili seasoning blend that can be used in a variety of recipes source.


