DIY Survival Water Filter
In our everyday lives, we might take the availability of clean water for granted. However, in emergency situations or when exploring the great outdoors, finding safe and pure water is crucial for our survival. Knowing how to create a DIY survival water filter can be a life-saving skill during these critical times. In this article, we will delve into the basics of homemade water filters and the necessary materials required to construct one.
Devising a functional water filter can be easier than you think, as long as you’re familiar with the fundamentals and have the right materials on hand. By understanding water purification techniques and the filter construction process, you’ll be better equipped to ensure your safety in any natural disaster or emergency situation. Furthermore, you’ll gain an appreciation for alternative methods and gain insights into some frequently asked questions about DIY survival water filters.
Key Takeaways
- Developing a DIY survival water filter is crucial for ensuring access to clean water in emergencies or outdoor adventures.
- Familiarizing oneself with water purification techniques and filter construction paves the way for a successful DIY water filter.
- Exploring alternative methods and addressing common questions enhances one’s overall knowledge and preparedness for various situations.
Understanding the Importance of Clean Water
As a survivalist, I cannot stress enough the importance of clean water. Clean, drinkable water is crucial for maintaining good health and preventing dehydration. Contaminated water, on the other hand, can lead to serious health problems, like waterborne illnesses or infections. Moreover, water quality directly affects our body’s ability to regulate temperature, as well as the efficiency of our digestive systems.
I’ve encountered muddy water during my outdoor adventures, and I quickly learned that drinking it without proper filtration poses significant risks. Water laden with silt, bacteria, and harmful pathogens is not safe to consume. Therefore, finding a suitable water source and ensuring its quality are essential in survival situations.
When dealing with water purity, it’s essential to remember that clear water doesn’t always equal safe water. While clear water may have fewer visible impurities, it can still harbor invisible pathogens or harmful chemicals. That’s why I always make it a point to utilize safe and effective water filtration techniques to obtain the cleanest water possible.
By comprehending the value of clean water and the repercussions of consuming contaminated water, we’re better equipped to prioritize our actions in any survival scenario. With this knowledge in mind, I encourage fellow enthusiasts to always be prepared and practice proper water filtration methods. Achieving high water quality can be the difference between life or death when faced with challenging circumstances.
Identifying a Water Source
When I’m in the great outdoors, one of my top priorities is finding a suitable water source to stay hydrated and healthy. To spot an unfiltered water source, I look for streams, rivers, or lakes that might have clean, fresh water. I always make a mental note of the water’s clarity and any potential contaminants in the area, such as dead animals or nearby human activity.
It’s best for me to stay away from stagnant water sources like puddles or ponds, which often contain harmful bacteria or parasites. Instead, I try to find flowing water sources, as the movement helps to reduce the risk of contamination. The water might not be as safe as tap water, but if it’s my only option in a survival situation, it will have to do.
When selecting the best water source, I pay attention to the water’s color and smell. Clear water is always preferable over murky or discolored water, and a strong odor can indicate that contaminants might be present. Even if I find a seemingly clean water source, I always plan to filter and purify it to ensure it’s safe for consumption.
In summary, it’s crucial for me to identify a water source in the great outdoors to stay hydrated and maintain my well-being. I prioritize finding a flowing and clear water source and avoid stagnant or contaminated water bodies, ensuring that my unfiltered water is as clean as possible before filtering and purifying it.
Homemade Water Filter Basics
As a survival enthusiast, I understand the importance of clean drinking water. That’s why I learned how to create my own DIY survival water filter. In this section, I’ll share the basics of creating a homemade water filter that can be a lifesaver in emergency situations.
To make a simple water filter, the first step is to gather the necessary materials. These typically include pebbles, sand, cloth, and charcoal. I’ve found that it’s essential to have these materials handy in order to make an effective filter. With the right water filters in place, we can significantly reduce contaminants and make water safer to drink.
The basic idea behind a DIY water filtration system is to use layers of materials to filter out impurities. The process starts with placing a layer of pebbles at the bottom of a container. The pebbles provide a solid foundation and allow water to pass through, while larger debris is trapped.
Above the pebbles, I usually add a layer of sand. Sand acts as a finer filtration layer, catching smaller particles that the pebbles might not have caught. It’s crucial to have a thick enough layer of sand to provide adequate filtration.
The next step is to place a piece of cloth on top of the sand. The cloth serves as a barrier, preventing sand from entering the filtered water. Additionally, the cloth catches finer particles that may have made it through the sand layer.
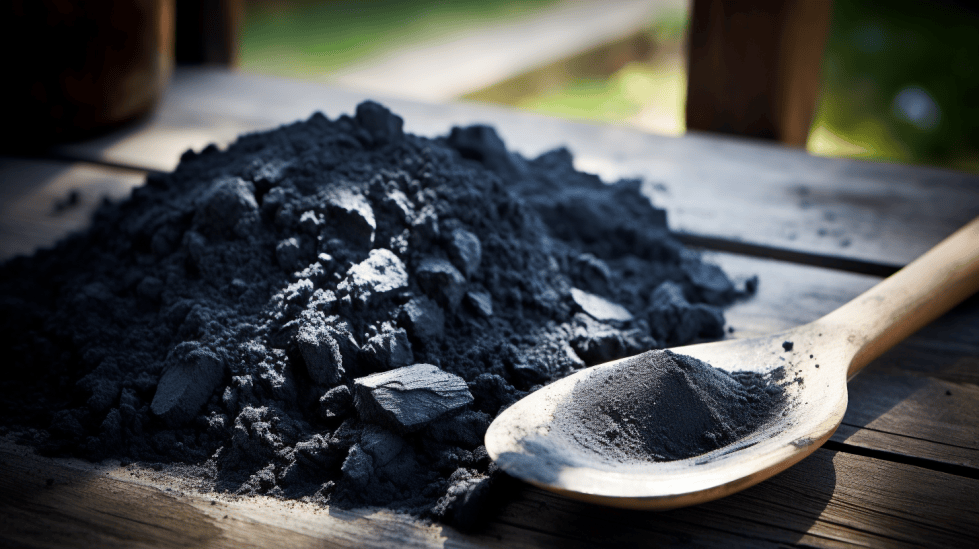
Lastly, I add a layer of charcoal on top of the cloth. Charcoal acts as an excellent filtering agent due to its porous nature. It helps to absorb chemicals, bacteria, and odors, further improving the water quality.
In emergency situations, DIY water purifiers can come in handy. While these homemade filters may not be as effective as commercial ones, they do provide a basic level of filtration that could potentially save lives. I highly recommend learning how to build your own water filter and keeping the materials needed for it as part of your survival kit. Remember, when it comes to clean drinking water, being prepared with the right tools is essential.
Gathering Materials
Before I start building my DIY survival water filter, it’s important to gather the necessary materials. Here are the items I’ve found most useful:
- A plastic water bottle or plastic soda bottle: This will serve as the container for my filter. I can use a clean, empty bottle of any size, depending on my needs and how much water I want to filter at once.
- A gallon bucket: This will be the container for collecting filtered water. It’s important to choose a clean one to avoid contaminating the filtered water.
- Cotton balls: I’ll use these as one of the filtering layers to remove debris and larger particles from the water.
- A rubber band: This handy tool helps to secure the different filtering layers in place.
- Paper coffee filter or birch bark: Both of these materials work well as a base layer for my filter. I prefer using a paper coffee filter because it’s easy to find and cheap, but birch bark works great too, especially in a pinch.
- Fine sand: This layer helps to remove smaller particles and some pathogens from the water. It’s important to use clean, uncontaminated sand.
- Coarse sand: I’ll also need this to create an effective filtration system. Combining it with the fine sand helps to create a more efficient filtering process.
- Small rocks or small stones: As an additional filtering layer, these will help to remove larger debris from the water.
- Activated charcoal or store-bought charcoal: This crucial component serves to remove toxins, harmful chemicals, and odors from the water. If I can’t find activated charcoal, I can use store-bought charcoal instead, but it won’t be as effective.
- Porous materials: Any additional porous materials I have on hand can be added as extra filtering layers to improve the overall efficacy of my DIY filter.
By gathering these simple materials, I can create an effective water filter that will provide me with clean, safe drinking water in a survival situation.
Filter Construction Process
I started constructing my DIY survival water filter by first finding a suitable plastic bottle with a cap. The size of the bottle can vary, but a common choice is a 2-liter soda bottle. After obtaining the bottle, I proceeded to cut the bottom off, creating a funnel-like shape. This bottom part will serve as the top of our filter system.
Next, I removed the cap from the bottle and carefully drilled a small hole in the center. This is where the filtered water will eventually flow out. With the hole in the cap, I then placed it back on the now bottomless bottle.
I prepared the filter material by first collecting small pebbles and rinsing them thoroughly to remove any dirt or debris. After that, I added a layer of these pebbles at the bottom of the plastic bottle, followed by a layer of sand. The sand acted as a secondary filter medium, helping to further clean any passing water. At this point, I had my bottom of the filter ready for water filtration.
Lastly, I opted to use activated charcoal as an additional filter medium, as it can help remove pollutants, odors, and even some harmful microorganisms from the water. I added this activated charcoal layer on top of the sand, making sure to also rinse it clean before placing it inside the bottle.
Now, with all filter materials in place, my DIY survival water filter was ready for use. Whenever I needed to filter water, I would simply pour unfiltered water into the top of my makeshift system, where it would then pass through the layers of pebbles, sand, and activated charcoal before finally being collected at the bottom part of the bottle (with the cap on), perfectly filtered and ready to drink.
The DIY survival water filter is a simple and effective way to obtain clean water in an emergency or survival situation. Its construction process is straightforward, making it a valuable asset in any outdoor adventure or wilderness experience.
Water Purification Techniques
As a survivalist, I find it essential to know various water purification techniques, as having access to clean drinking water is crucial. In this section, I will discuss some methods that I’ve found useful in ensuring a safe water supply.
One reliable method I use is water purification tablets, which are effective in eliminating harmful bacteria and viruses. By simply following the instructions on the product’s packaging, I can treat several gallons or liters of water in a short amount of time.
Another technique I apply involves using a DIY survival water filter, made from easily accessible materials. First, I pour water over a cloth with pebbles on top to filter out larger debris. Then, I remove the pebbles and pour sand over the cloth, allowing the water to pass through it for a finer filtration. This helps remove heavy metals and other contaminants.
In situations where the water is cloudy or murky, I recommend letting it settle for some time. This will allow the particles to sink to the bottom, resulting in clearer water. Decanting or gently pouring the clear water into a separate container can then be done, followed by other purification methods.
It’s also important to consider the size of the water supply when purifying. I usually try to have at least a few gallons or liters of water on hand at all times. This ensures that I have enough potable water for drinking, cooking, and hygiene purposes.
Through these techniques, I can successfully obtain purified water, free from harmful contaminants and pathogens. Whether using water purification tablets, a DIY survival water filter, or simply allowing water to settle, knowing these methods has helped me ensure access to clean drinking water in various outdoor or emergency situations.
Natural Disaster and Emergency Preparedness
In times of natural disasters or emergency situations, having access to clean drinking water is essential for survival. I’ve experienced firsthand the importance of being prepared and resourceful, which is why I want to share some valuable information on how to create a DIY survival water filter using natural materials.
During a natural disaster, finding clean water sources can be challenging, and it’s crucial to have a way to purify water for our consumption. In a survival situation, I know that I can use natural materials like sand, rocks, and charcoal to build an effective, makeshift filter. Not only will these materials remove debris and impurities, but they’ll also improve the overall taste of the water.
To begin, I would collect a container such as a plastic bottle and cut it in half. Next, I would gather a few layers of fine cloth, which can be used to support the filtration layers. Pebbles and sand can be obtained from the surroundings, while crushed charcoal can be sourced from a fire. It’s important to layer these materials starting with large pebbles, then medium and small ones, followed by sand, crushed charcoal, and another layer of sand, with each layer separated by cloth. This setup will provide a reliable filtration system in an emergency situation, and each layer plays a crucial role in the purification process.
In case I find myself without access to clean water for a long time, proper maintenance of the filter becomes essential. With regular use, sediment and debris can accumulate in the layers, requiring cleaning or replacement. If available, boiling the filtered water can provide additional security against harmful microorganisms, ensuring that if I must rely on this makeshift filter for an extended period, my health won’t be compromised.
Armed with this knowledge, I feel more confident and prepared to face situations where clean water might be scarce. By understanding the essentials of creating a DIY survival water filter using natural materials, I am better equipped to take on any natural disaster or emergency scenario that might arise.
Additional Considerations and Alternatives
One good thing to remember when creating a DIY survival water filter is the importance of considering both larger and smaller particles in the water. Larger particles can be easily filtered using a cloth or even a makeshift filter made from natural materials like sand, gravel, and charcoal. However, smaller particles, such as bacteria, viruses, and other harmful microorganisms, require more advanced methods of filtration.
A good source of effective natural water purification methods can be found in bio-sand filters, which work on a smaller scale but are perfect for long-term use at home, or even in emergency situations. Combining layers of sand, gravel, and charcoal, bio-sand filters can help eliminate the majority of harmful contaminants present in the water, turning it into a drinkable resource.
A great way to deal with smaller particles is boiling the water after the initial filtration step. Boiling water for one minute or more will kill most organisms that are harmful, making safe drinking water. This might not be the most efficient method when considering energy and time consumption, but it’s one of the simplest things you can do to improve water quality in a survival situation.
Brita filters, which are commonly used for household water filtration, could also be a good alternative for short-term situations. Although not designed for removing harmful microorganisms, they can improve the taste of the water by reducing the presence of chemicals like chlorine, as well as filtering out some larger particles.
For those who are pregnant or have compromised immune systems, it’s a good idea to consider other additional purification methods, such as water treatment tablets or personal filtration devices like the LifeStraw or Sawyer filters. These portable filters can remove over 99.9% of the bacteria, viruses, and protozoa from the water, making it safer to drink.
One last thing I’d like to mention is the importance of staying informed and always being prepared. Sometimes, the simplest actions, like knowing how to build a basic survival water filter from scratch, can make all the difference in critical situations. So, don’t be afraid to invest time into learning different water purification techniques for your emergency preparedness.
Frequently Asked Questions
How can I create a long-term water purification system at home?
Creating a long-term water purification system at home can be achieved by setting up a multi-stage filtration process. This typically includes a sediment pre-filter, an activated carbon filter, and an ultraviolet (UV) light sterilizer. By using this combination of filtration methods, I can ensure my water supply is free from contaminants, chemicals, and biological pathogens.
What are common materials used in homemade water filters?
Common materials used in homemade water filters include pebbles, sand, cloth, and charcoal. These materials can effectively help in removing debris, sediments, impurities, and some chemicals from the water source.
What is the most effective way to filter lake water for drinking?
The most effective way to filter lake water for drinking is by using a combination of filtration and purification methods. I would recommend using a portable water filter, followed by boiling or using chemical treatments (such as iodine tablets) to remove any remaining bacteria and pathogens. Keep in mind, depending on the lake’s water quality, additional filtering may be required.
How can I use activated charcoal to improve water filtration?
Activated charcoal can be used to improve water filtration by adding it as a layer in a homemade water filter or cartridge. It helps to adsorb impurities, chemicals, and organic pollutants, improving water taste and odor. To use activated charcoal, simply place it between layers of sand and pebbles in the filter system.
How to make a water filter using a bottle at home?
To make a water filter using a bottle at home, I would need to gather an empty plastic bottle, pebbles, sand, and a piece of cloth or coffee filter. First, I would cut off the bottom of the bottle, then place the cloth or coffee filter over the opening. Next, I would layer the pebbles, sand, and charcoal inside the bottle. After assembling the filter, I would pour water through the top and collect the filtered water from the bottom.
What are some natural methods to filter water in the wild?
In the wild, there are several natural methods I can use to filter water. One method is using rocks and sand to create a makeshift filter. Another method is using plant materials, such as leaves or moss, to catch debris and sediment. Also, finding and utilizing natural water sources that have been filtered through the ground, like springs and underground wells, can be a reliable way to obtain clean water. Regardless of the method used, it is essential to combine these filtration methods with purification, such as boiling or using disinfecting tablets, before consuming the water.


