How to Grow Microgreens Without Soil
Growing microgreens without soil is an innovative and efficient way to cultivate these nutrient-dense plants year-round. By using hydroponic systems, you can maximize space and enjoy the benefits of soilless cultivation.
Microgreens are young plants that are harvested just after their first true leaves have developed. They provide a variety of flavors and offer numerous health benefits. Hydroponics is a method of growing plants without soil, where plants receive the necessary nutrients directly from the water. This soilless approach results in faster growth, better nutrient absorption, and less need for pesticides.
Understanding the basics of hydroponic gardening and choosing the right grow medium are crucial for successful microgreen cultivation. By setting up and maintaining an appropriate environment, you can avoid common mistakes and grow microgreens year-round without soil.
Key Takeaways
- Hydroponic systems allow for efficient and year-round cultivation of microgreens.
- Choose the right grow medium and maintain a suitable environment for optimal growth.
- Soilless cultivation has advantages such as better nutrient absorption and reduced need for pesticides.
Understanding Microgreens
Microgreens are young vegetable greens that are harvested just after the cotyledon, or first set of true leaves, have developed. They are packed with flavor and nutrients, making them popular additions to salads, sandwiches, and smoothies. Additionally, they are simple to grow and maintain, even without soil.
I have experimented with various types of microgreens, from basic options like radish, kale, and mustard to more exotic species like tatsoi and mizuna. Each microgreen has its distinct flavor profile and nutritional value. Some of the most popular microgreens include:
- Arugula: It has a peppery and bold flavor, providing a good source of calcium and vitamins A, C, and K.
- Broccoli: This microgreen has a mild and slightly bitter taste. It is rich in vitamins A, C, E, and K, along with minerals like iron and calcium.
- Kale: Kale microgreens have a slightly sweet, cabbage-like flavor, and are loaded with vitamins A, C, and K as well as minerals such as magnesium, potassium, and calcium.
For starting with microgreens, I find it essential to choose high-quality seeds. Proper seed selection can make a significant difference in the success of growing microgreens. Look for seeds labeled as “microgreen seeds” or “for sprouting,” as these will typically yield the best results.
One of the main advantages of growing microgreens is their high nutritional value. According to a research conducted by the U.S. Department of Agriculture and the University of Maryland, microgreen leaves contain more nutrients than the mature leaves of the same plants. This makes them an excellent addition to any diet.
Overall, understanding microgreens and how to grow them without soil enables us to have a sustainable and nutritious source of greens year-round. By selecting the right seeds, experimenting with various types, and nurturing them properly, I can confidently grow microgreens and enjoy their numerous health benefits.
Hydroponic Gardening Basics
I believe hydroponic gardening offers an excellent alternative to traditional soil-based growing methods. It’s a fantastic way to grow microgreens without soil and is continuously gaining popularity among gardening enthusiasts. In hydroponic gardening, plants are grown in a nutrient-rich water solution instead of soil, providing them with the necessary nutrients for optimal growth directly through their roots.
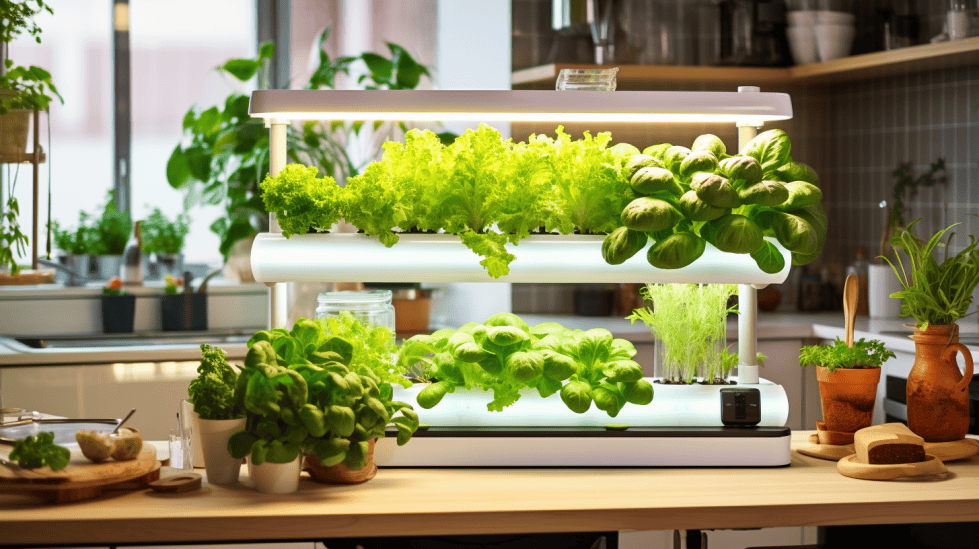
There are various hydroponic systems and methods to choose from when starting your hydroponic garden. For instance, you could go for nutrient film technique (NFT), aeroponics, or drip systems. Each method has its own set of advantages and requirements, so make sure to choose the one that suits your space and personal preferences.
Growing hydroponic microgreens has several benefits compared to traditional methods. Firstly, it allows for year-round cultivation as it can be done indoors, regardless of the season. This is particularly helpful for those of us living in areas with harsh weather conditions. Moreover, hydroponic gardening maximizes space since the plants can be grown more densely, making it perfect for small spaces such as apartments or balconies.
In addition, hydroponic systems use up to 90% less water than soil-based methods, making it an environmentally friendly way of growing your plants. Furthermore, you have better control over the nutrient levels of your plants, resulting in faster growth as well as higher yielding and more nutritious microgreens.
Growing hydroponic microgreens is also a cleaner and more hygienic option. There’s no soil involved, which can be a breeding ground for pests and bacteria. This not only reduces the risk of contamination, but also makes the resulting greens cleaner and easier to consume.
In conclusion, growing hydroponic microgreens is a worthwhile endeavor for any gardening enthusiast, especially those with limited space or unfavorable environmental conditions. With better control over the growing conditions, the opportunity for year-round cultivation, and a cleaner, more hygienic process, hydroponic gardening just might be the perfect solution for you.
Choosing Your Grow Medium

When it comes to growing microgreens without soil, selecting the right grow medium is essential. I’ve researched and experimented with different growing mediums and decided to narrow down the options to the following three main choices that most people prefer: coconut coir, hemp mats, or clay pebbles. In this section, I’ll share my thoughts on these options to help you choose the best one for your needs.
Using Coconut Coir
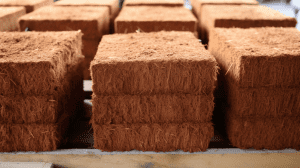
Coconut coir, also known as coco coir, is a popular choice for growing microgreens without soil. It’s a natural byproduct of the coconut industry and offers excellent water retention properties, while also providing the necessary support for microgreens to grow. My experience with coconut coir has been positive as I found it easy to work with and it doesn’t require much maintenance. You can use coco coir as a growing medium by placing a layer on top of a soil tray or other containers. Just make sure to keep it moist but not waterlogged for optimal growth.
Hemp Mats Vs Grow Mats
Another option for growing microgreens without soil is to use hemp mats or grow mats, also referred to as grow pads. Both of these options provide the necessary support and moisture retention for microgreens to thrive. Hemp mats, made from the fibers of the hemp plant, tend to be more sustainable and eco-friendly compared to traditional grow mats, which can be made from various materials such as jute, wood fiber, or plastic. I’ve experimented with both and found that hemp mats are not only a sustainable choice but are also easier to handle, which is a big plus.
Opting for Clay Pebbles
Lastly, I would like to talk about clay pebbles as a growing medium for microgreens. Clay pebbles, also known as hydroton or LECA (Lightweight Expanded Clay Aggregate), are small, porous clay balls that can hold a significant amount of moisture. They can be a good choice for people looking for a more reusable and easy-to-clean medium. However, in my experience, clay pebbles can be a bit heavier compared to the other options, and keeping the right moisture balance can be challenging since they can dry out quicker than cocoa coir or hemp mats.
By considering your specific needs and experimenting with these different grow mediums, you’ll be able to decide which option works best for your microgreens growing process. Remember, keeping the grow medium moist and providing the right support to your microgreens is crucial for optimal growth.
Building Your Hydroponic Setup
As someone who’s experienced in growing microgreens without soil, I recommend starting with a proper hydroponic setup. First, gather the necessary equipment, which includes a growing tray, spray bottle, grow lights, and proper air circulation.
For the growing tray, I suggest using one that has drainage holes at the bottom, which will prevent water from pooling and promote efficient nutrient distribution. Fill the tray with a soil-less growing medium like coconut coir or hemp mats. Before planting the seeds, I always pre-soak the medium using a spray bottle to ensure even moisture distribution.
Air circulation plays a crucial role in preventing mold growth and promoting strong, healthy plants. In my experience, a small fan placed near the microgreens can help achieve proper air circulation. Remember to maintain a moderate room temperature to avoid any unnecessary stress on the plants.
Lighting is key when growing microgreens indoors. I have had success using fluorescent lights or LED grow lights as my main source of artificial lighting. However, if you have a south-facing window that provides adequate sunlight, you may not need additional lighting. Keep in mind that microgreens typically require 12 to 16 hours of light per day for optimal growth.
In summary, building a hydroponic microgreen setup involves a properly designed growing tray, an even moisture distribution system, effective air circulation, and sufficient lighting. With these factors in place, your microgreens will thrive without the need for soil.
Step-by-Step Guide to Planting
Selecting the Seeds
In the beginning, I would choose fast-growing microgreens that are easy to grow and harvest. When selecting seeds, I look for varieties that are specifically meant for growing microgreens. Some good options include radishes, kale, and arugula. Don’t forget to consider your personal taste preferences when picking seeds.
Rinsing and Pre-Soaking
Before planting, I rinse my seeds in clean water to remove any debris or contaminants. This helps to promote healthy plant growth and germination. I use a fine mesh strainer to make sure I don’t lose any seeds during this process. After rinsing, I pre-soak the seeds for a few hours or overnight in distilled water. This helps to speed up the germination process. I use around 2-3 tablespoons of seeds and enough water to cover them completely.
Planting and Watering

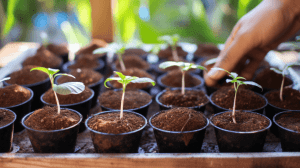
Once my seeds are soaked, I drain them well and spread them on a growth medium of my choice. Keep in mind that growing microgreens without soil usually means using a hydroponic system. I ensure even distribution of seeds and a thin layer of growth medium on top, if necessary. I prefer to keep the water level relatively low in the beginning, using about a cup of water, so that the seeds have enough moisture to germinate but don’t become submerged.
To maintain a healthy water solution, I may add some nutrient solutions for better growth. I check the water levels daily and add clean water as needed to keep the growth medium moist.
Providing Sufficient Light
Light is essential for the growth of my microgreens, and I make sure to provide them with enough light right from the beginning. Placing them near a sunny window is a good option, but I can also use artificial light sources if needed. I ensure that my microgreens receive 12-16 hours of light per day for optimal growth.
Harvesting Your Microgreens
As soon as my microgreens have developed their first set of true leaves, usually within 1-3 weeks, I’m ready to harvest them. Using a sharp knife, I carefully cut the microgreens right above the growth medium. Harvesting is best done right before using them in a recipe to ensure the freshest flavor. After cutting, I wash my microgreens in cold water and gently pat them dry with a clean towel before using them in my favorite dishes.
Maintaining the Right Environment
Growing microgreens without soil requires a keen attention to maintaining the right environment. In this section, I’ll cover the essentials of keeping optimal pH levels, ensuring water quality, and re-evaluating the light source.
Keeping Optimal PH Levels
It’s crucial to keep the pH levels of the water in the right range for microgreens to flourish. The ideal pH range for most microgreens is between 5.5 and 6.5. Too high or too low a pH level can lead to nutrient deficiencies, stunted growth, or even plant death.
To achieve the right pH levels, I use pH test kits or pH test strips to measure the pH of the water regularly. These are easily available online or at gardening stores. Once the pH levels are determined, I adjust them using pH up or pH down solutions as needed.
Ensuring Water Quality

Water quality is paramount when growing microgreens without soil. Whether I’m using a hydroponic, aquaponic, or aeroponic setup, I make sure I’m using the best possible water source. Tap water may contain impurities or chemicals detrimental to plant growth, so I recommend using filtered water or reverse osmosis water instead.
Keep these points in mind while monitoring water quality:
- Test pH levels regularly (as mentioned above)
- Check for any signs of algae or mold growth, and clean the system if needed
- Monitor nutrient levels in the water, and adjust as necessary
Re-Evaluating Light Source
When it comes to light, microgreens need a consistent and adequate source to grow well. As I grow my plants indoors, it’s essential to provide them with a light source that mimics natural sunlight.
Here are some tips to ensure proper lighting:
- Avoid direct sunlight: Although sunlight is the best source of light for plants, it can be harsh and hard to regulate for microgreens. Using artificial light sources can provide more consistent and controllable conditions.
- Use LED or fluorescent lights: I prefer LED or fluorescent lights because they are energy-efficient and provide a full spectrum of light. These types of lights can be adjusted in terms of distance and duration, ensuring optimal growth.
- Check for even light distribution: It’s essential to make sure all plants receive equal amounts of light. Rotate trays occasionally if needed to provide even lighting to all microgreens.
Implementing these crucial steps in maintaining the right environment will allow your microgreens to thrive and grow without soil, ensuring a successful and bountiful harvest.
Growing Microgreens Year-Round
Achieving the Right Temperature
One of the key factors in successfully growing microgreens year-round is maintaining the right temperature. I constantly monitor the temperature in my growing area, ensuring that it remains at a steady level suitable for the microgreens I’m cultivating. Most microgreens thrive in temperatures between 60-75°F (16-24°C). By utilizing an indoor hydroponic system or other soilless growing methods, year-round growth becomes easily attainable.
Rotating Crop Species
To ensure a continuous supply of microgreens throughout the year, I incorporate the practice of rotating crop species in my growing cycles. By doing so, my microgreens production remains diverse and fresh. Additionally, this rotation helps me avoid plant-specific diseases and pests, as well as keeps the microgreens’ nutrient profiles more balanced.
Once the microgreens have developed their first set of true leaves, which typically takes around 7-14 days, I harvest them and proceed to the next step. At this point, I’m ready to sow the seeds for the next species in my crop rotation plan, ensuring that I always have fresh microgreens available. By growing various species of microgreens and maintaining optimal temperatures, I’m able to enjoy the countless benefits of fresh, nutrient-rich microgreens year-round.
Common Mistakes to Avoid
When I first started growing microgreens without soil, I encountered some common mistakes that can hinder their growth and potentially ruin the harvest. I learned that it’s essential to avoid these errors to successfully grow healthy, soilless microgreens.
One mistake I made was using excess water, which caused my microgreens to rot. It’s crucial to maintain just the right amount of water in the hydroponic system to prevent such situations. In general, growing without soil requires 20% less water compared to growing in soil.
Another error I encountered was not providing the essential nutrients that microgreens need for healthy growth. Adding a nutrient solution specific to your microgreens is vital for proper growth in a soilless environment. Do your research and select the right nutrient formulation for the microgreens you’re growing.
I also noticed that some people mistakenly harvest their microgreens too early or too late. The optimal harvest period for microgreens is usually within 7-14 days, depending on the variety you’re growing. Keep an eye on your microgreens, and harvest them when they reach the appropriate size and maturity. Avoid waiting too long, as this may result in a less flavorful and nutritious yield.
At times, microgreens may fail to germinate properly, often due to incorrect growing conditions. It’s essential to maintain ideal conditions throughout the germination period, which can range from 3-4 days for some varieties to 4-5 days for others. Ensure that the environment remains consistently warm, humid, and well-lit during this crucial stage.
In conclusion, growing microgreens without soil can be a rewarding and efficient endeavor, but avoiding common mistakes is vital for success. By carefully controlling the water, nutrients, and growing conditions, you can enjoy a bountiful harvest of fresh, healthy microgreens.
Advantages of Soilless Cultivation
In my experience, growing microgreens without soil is an excellent idea, offering numerous benefits. One of the key advantages is that it’s a clean and easy way to cultivate these nutritious greens. I’ve found it particularly useful to use paper towels or prepared growing medium like clay pellets as an alternative.
The good news is that this soilless cultivation also results in faster growth, as young plants don’t need to expend their energy searching for nutrients in the soil. Hydroponic systems play a crucial role in optimizing growth by allowing me to have complete control over plant nutrients and lighting conditions.
I’ve noticed that soilless cultivation methods require less space, meaning I can grow more microgreens in a smaller area, making this approach an efficient choice for limited indoor spaces. Additionally, microgreens can be grown all year round, providing a consistent and healthy addition to my meals.
Ordering growing materials from online retailers is hassle-free and offers various mediums to choose from, such as rockwool cubes and peat moss. This flexibility gives me the opportunity to try different methods and find out which one yields better results based on my personal preferences.
I highly recommend soilless cultivation of microgreens to beginners looking for an easy and manageable way to grow. The convenience and cleanliness offered by this method, along with the control it provides over the plants’ growth, makes it a great way to enjoy homegrown, nutritious microgreens.
Frequently Asked Questions
What is the best hydroponic system for growing microgreens?
In my experience, the most effective hydroponic system for growing microgreens is the Nutrient Film Technique (NFT) system. This technique involves a shallow stream of water containing essential nutrients flowing through channels or growing trays, providing an ideal environment for microgreens to flourish. The NFT system maintains humidity and air circulation, which are crucial factors for successful growth.
How can I grow microgreens in trays without soil?
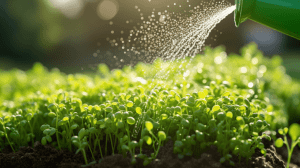
To grow microgreens in trays without soil, first select a suitable growing medium like coconut coir, peat moss, or vermiculite. Fill a growing tray with the chosen medium and distribute the seeds evenly. Keep the medium moist by misting it regularly, ensuring that it doesn’t become soggy. Place the trays under grow lights or in a sunny location, and your microgreens will begin to sprout within a few days.
Which growing mediums are suitable for soilless microgreens?
Some suitable growing mediums for soilless microgreens include coconut coir, peat moss, and vermiculite. Coconut coir is an excellent choice due to its sustainability and water retention properties. Peat moss is another common option that offers aeration and enables proper root development, while vermiculite is ideal for moisture retention and insulation, providing a suitable environment for microgreen growth.
How do I grow microgreens indoors using water only?
To grow microgreens indoors using only water, a hydroponic system like the Nutrient Film Technique (NFT) or deep water culture will be necessary. In these systems, you’ll suspend the seeds above a nutrient-rich water solution, allowing the plant roots to absorb essential nutrients while maintaining exposure to oxygen. Regular monitoring of nutrient levels and water pH is crucial to ensure a successful harvest.
Can I use screens for growing microgreens without soil?
Yes, screens can be used for growing microgreens without soil. You can use a mesh screen or a similar support structure that allows microgreens to anchor their roots, ensuring proper aeration and water intake. This method is quite similar to hydroponics, as a nutrient-rich water solution will need to be provided directly to the roots.
What are the steps to grow microgreens in a jar with no soil?
Growing microgreens in a jar without soil involves the following steps:
- Select a clean jar with a wide opening, such as a mason jar or a large glass container.
- Fill the jar with a thin layer of an appropriate growing medium like vermiculite, coconut coir, or peat moss.
- Scatter the seeds evenly across the medium and mist the seeds with water to moisten them.
- Cover the jar with a breathable lid or cloth and keep it in a warm area away from direct sunlight.
- Check daily for germination, usually within 3-5 days. When the seeds have sprouted, remove the lid and move the jar to a sunny location, ideally near a window.
- Mist the microgreens regularly to maintain moisture and rotate the jar as needed to ensure even growth.
- Harvest your microgreens when they’ve reached the desired size by trimming them with scissors.


